1. 이미지를 업로드시, s3에 저장

- 아래 코드를 /var/www/html/wp-content/themes/sample/functions.php 에 추가

// After media uploaded
add_filter( 'wp_handle_upload', function( $upload, $context ){
    require_once $_SERVER['DOCUMENT_ROOT'] . '/vendor/autoload.php';

	define( 'S3_KEY', 'S3_KEY');
	define( 'S3_SECRET', 'S3_SECRET');
	define( 'S3_BUCKET', 'S3_BUCKET');
	define( 'S3_REGION', 'ap-northeast-2');

    $s3 = new Aws\S3\S3Client([
        'version' => 'latest',
        'region' => S3_REGION,
        'credentials' => [
            'key' => S3_KEY,
            'secret' => S3_SECRET,
        ]
    ]);

    $file_data = file_get_contents( $upload['file'] );
	$file_url = explode('/wp-content/',$upload['url']);
    $s3_key = $file_url[1];

    $result = $s3->putObject([
        'Bucket' => S3_BUCKET,
        'Key' => $s3_key,
        'Body' => $file_data,
        'ACL' => 'public-read'
    ]);


    return $upload;
}, 10, 2);


※ 위 코드는 s3에도 저장만 하는 방법입니다.

아직 작업중이니, 추후에 업데이트 하도록 하겠습니다.

워드프레스는 기본적으로 모든 이미지가 'wp-content/uploads' 경로로 저장이 됩니다.

그래서 ELB로 여러대의 서버를 분산시키거나, 서버 교체시 이미지가 404나는 경우가 발생하곤 합니다.

이런 상황을 방지하고자 워드프레스와 AWS S3와 연동하는 법을 찾아보겠습니다.

※ 사전에 꼭 필요한 것들

- composer

https://aljshal.tistory.com/54


- php-xml

$ sudo yum install -y php-xml


- S3 Key

https://aljshal.tistory.com/55


1. AWS SDK for PHP 설치

- 아래 코드 실행 후, /var/www/html 위치에 vendor 폴더 및 관련 파일이 설치되었는지 확인

$ cd /var/www/html
$ composer require aws/aws-sdk-php


2. 샘플 코드 테스트

- 아래 코드를 test.php 로 저장하여 웹에서 실행

- s3 버킷에 이미지가 저장되고, 그 주소가 출력되면 성공

<?php

ini_set( 'display_errors', 1 );

require_once 'vendor/autoload.php';


use Aws\S3\Exception\S3Exception;
use Aws\S3\S3Client;

echo '<pre>';

define( 'S3_KEY', 'S3_KEY');
define( 'S3_SECRET', 'S3_SECRET');
define( 'S3_BUCKET', 'S3_BUCKET');
define( 'S3_REGION', 'ap-northeast-2');

$s3 = new S3Client([
    'version' => 'latest',
    'region' => S3_REGION,
    'credentials' => [
        'key' => S3_KEY,
        'secret' => S3_SECRET,
    ]
]);

$file_url = 'https://www.example.com/sample-logo.jpg';
$s3_path = 'uploads/sample-logo.jpg';
$file_data = file_get_contents( $file_url );

try{
    $result = $s3->putObject([
        'Bucket' => S3_BUCKET,
        'Key' => $s3_path,
        'Body' => $file_data,
        'ACL' => 'public-read'
    ]);
    echo $result['ObjectURL']. PHP_EOL;
} catch ( S3Exception $e ) {
    echo $e->getMessage();
}

로컬에 Laravel 설치하는 법을 살펴보겠습니다!

(서버세팅과 composer 설치는 추후 업데이트 하겠습니다)

1. Laravel 설치

- 기본 설치 위치는 C:/User/유저명

- 'myapp' 은 생성할 프로젝트&폴더명(myapp이라는 폴더를 생성하고, 그 위치에 설치됨)

$ composer create-project laravel/laravel myapp --prefer-dist --verbose

2. 설치 확인

$ cd myapp $ php artisan --version # Laravel Framework version x.x.x


3. 로컬 서버 구동

$ php artisan serve


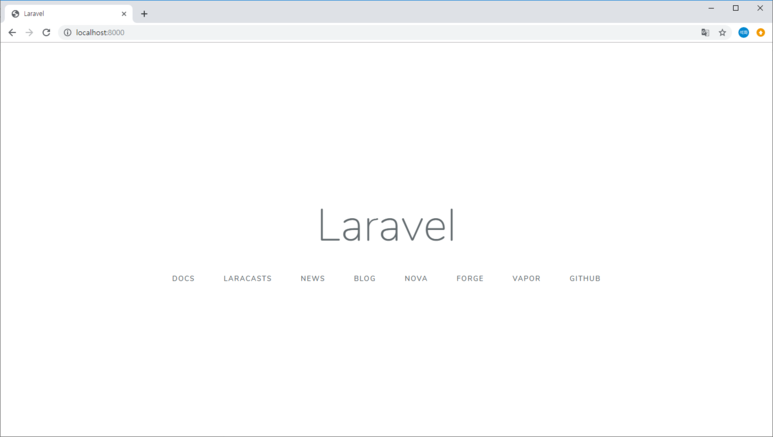
4. http://localhost:8000 으로 확인

- 아래와 같은 화면이 나오면 성공!


외부 업체에 맡기고 있는, 워드프레스 사이트를 AWS로 이관하는 작업을 진행하였는데,

HTTPS 에 문제가 생겨 제대로 작동하지 않았다.

AWS에서 ALB와 ROUTE 53, ACM을 이용하였는데, 근본적인 원인은 파악하지 못했다...

일단 해결방법은 아래 코드를 wp-config.php 에 추가하면 된다.


if(strpos($_SERVER['HTTP_X_FORWARDED_PROTO'], 'https') !== false)
	$_SERVER['HTTPS'] = 'on';

Python으로 구글 스프레드 시트에 연결하여 읽고 쓰는 방법입니다!!!

(정말 엄청난 삽질과 구글링 끝에.....엉엉)

1. 구글 API 만들기

1) https://console.developers.google.com 에 접속해서, 좌측의 라이브러리에서 API 검색 후 설정

- Google Sheets API, Google Drive API 두개 설정해야 합니다.

- 설치 후, 사용자 인증? 해야 합니다.(방금 해놓고 까먹은....)

2. 사용자 인증 정보 만들기

1) https://console.developers.google.com 에 접속해서, 좌측의 '사용자 인증 정보' 클릭 후, 계정 생성

2) JSON으로 생성하고, 여기서 다운받은 파일을 잘 간수하세요.

3. 구글 시트 만들기

1) 시트를 만든 후, 공유버튼을 클릭하여, 다운받은 json 파일에 있는 client_email 을 수정권한으로 초대

4. 코딩코딩

pip install gspread
pip install --upgrade oauth2client
pip install PyOpenSSL
import gspread
from oauth2client.service_account import ServiceAccountCredentials

scope = ['https://spreadsheets.google.com/feeds',
         'https://www.googleapis.com/auth/drive']

credentials = ServiceAccountCredentials.from_json_keyfile_name('C:\dev\My Project-sample.json', scope)

gc = gspread.authorize(credentials).open("Google Sheet Name")

wks = gc.get_worksheet(0)

gc.get_worksheet(-1)## integer position으로 접근
gc.worksheet('Sheet Name) ## sheet name으로 접근

wks.update_acell('D1', 'It's Work!')

# Select a range
cell_list = wks.range('A1:C7')

for cell in cell_list:
    cell.value = 'test'

# Update in batch
wks.update_cells(cell_list)

끝!


'Programming > Python' 카테고리의 다른 글

Python Mailchimp API 연동  (0) 2019.07.16
Python 웹페이지 크롤링 후 Slack으로 공유  (1) 2019.07.16
Phthon Pycharm으로 MySQL 연결하기  (1) 2019.07.16

+ Recent posts